Part 1: Chapter I: Novus Orca
Chapter I: Hope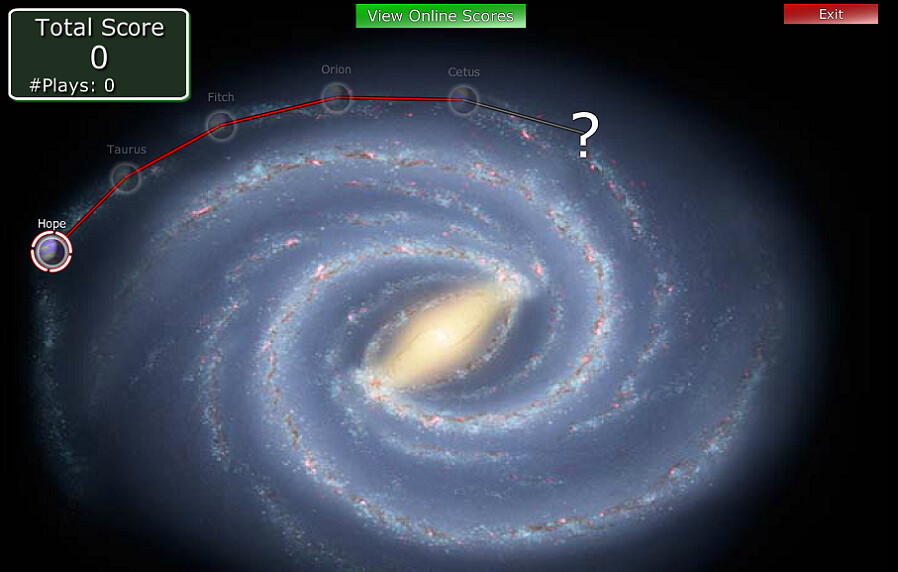
Here is the galaxy, and with it the first leg of our journey. The score is defined by how long you take to complete a level. Starting from 10,000 points, the total reduces slightly each second. I won't be concerning myself with that or the online leaderboard. I'll try to complete each level in a reasonably efficient manner, but beyond that is something for the metagamers.
You can replay any level at any time, but since we are just starting, Hope is the only option. We can see all the worlds of the first leg of the story; each one has five, and there are multiple legs to achieve. When we click on Hope planet to begin, we are presented with backstory of what came before:

https://www.youtube.com/watch?v=Sad...8UIRi8F&index=1
And so our backstory, such as it is. From a galactic empire we've been reduced to less than 50,000 souls, our fate hanging on the 'prophecy of the Oracle', so to speak. And of course, my unproven skills as the Commander. We do not aim to defeat the Creeper; survival is the best we can hope for.
Video for the first(tutorial) world at Hope follows, or for those who prefer reading SSLP-style, you can easily skip that and follow the goings-on afterwards.
https://www.youtube.com/watch?v=3HN...8UIRi8F&index=2
I intentionally played fairly slowly to give time to see and read everything. There's more exposition here than there will usually be in other levels; longer videos and shorter explanations will be the norm.
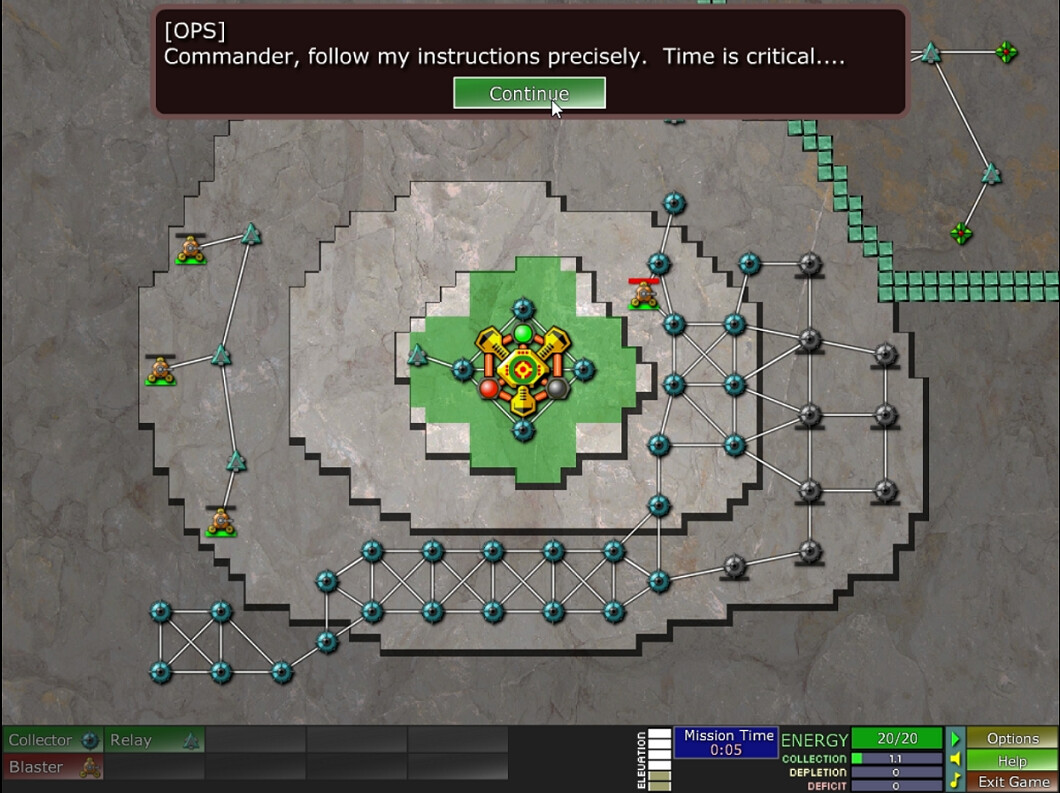
And here's our first actual gameplay look. Ignore the main view for now; at the top is a message, which is how the plot, such as it is, will be communicated to us. Time is actually not really critical at all here, so the 'manufacturing urgency' gimmick is on full display. But we do need to follow the instructions precisely. There'll be a lot of them, as this is the tutorial world, and we actually don't have much choice in following them, as we are literally not going to be permitted to do ANYTHING else.
The bottom of the screen has what I'll just call the 'Controls Bar'. Stuff we can build is on the left; currently there are three items there. It will expand to 10 eventually. Then, moving right, there's the elevation indicator(elevation of wherever the cursor is). The Mission Time indicator alternates between that and the current score, but both serve the same basic function.
** The Energy display is most important. We always, at least in the levels I've seen, start with 20/20, a small but full reserve. Energy is the only economic resource, which makes it pretty darn important. Collection is what we are currently bringing in(1.1), Depletion is what's currently being spent(nothing), and Deficit is what we'd be spending if we had enough income. Optimal play requires keeping near-constant tabs on this.
The next group of icons allow us to pause or unpause. For the purpose of this LP I will not be using pause at all; I think it's the way a game like this should be played. Then there's sound effects and music, which I'll leave on but can be muted. Options gives four resolution choices, turning a couple of effects on or off, changing music volume, and enabling double speed if you wish(I'll pass). Help brings up a pretty basic guide that still manages to be helpful. It has a few sections, which I'll go through as they are appropriate in the course of the game:
** Basic Gameplay -- is what it says
** Advanced Gameplay -- Second-tier concepts
** Strategy Tips -- Useful tactics
** Units -- Descriptions of the various buildable entities in the game. These are good, and I'll show them as we get to them.
So that's pretty much your UI for Creeper World 1. Nothing will happen, no matter how long we wait, until clicking the Continue button in the message at the top.
Indeed there is.
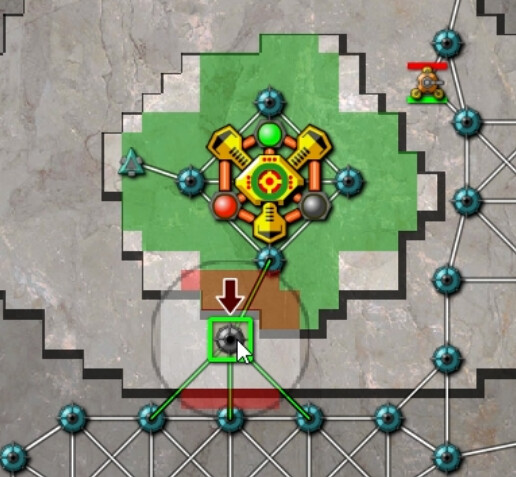
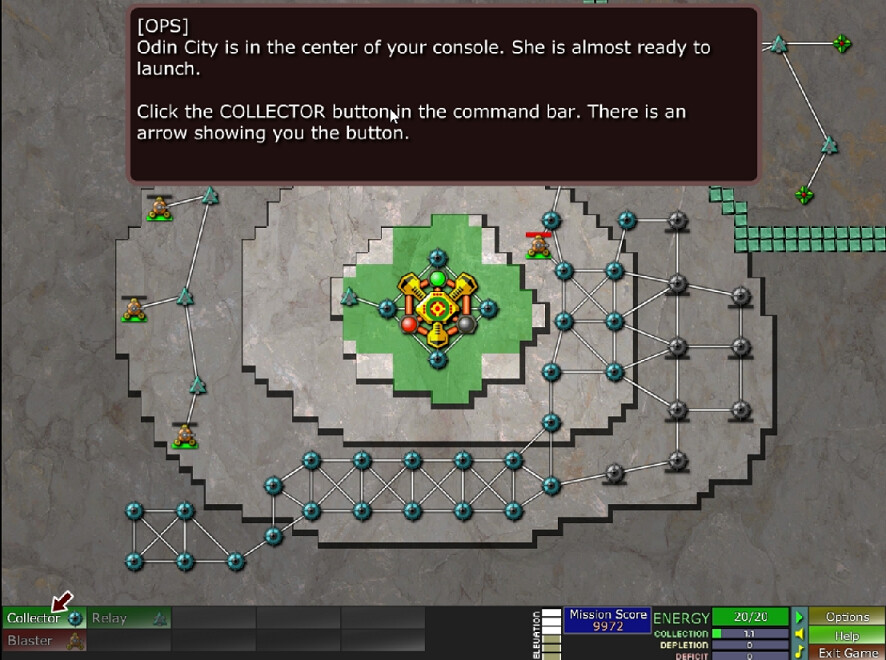
Notice how the ground is green by the collectors connected to Odin City, but not on the other ones. Before we place one, we can see these green lines(showing what it will connect to). Also a white squarish outline of what area it will gather energy from.notice the areas above and below the current elevation are shaded red, and those already covered by other collectors shaded brown. We won't gain energy from these areas; only what is white. The black circle is the connection radius; a collector placed here cannot connect to anything outside of it.
That's back in the bottom Controls Bar:

This here is good, fundamental advice. Also notice the green health bar on the new collector here, which is about half full. Notice the whitish-gray 'ball' which has just left Odin City. These are construction packets, which Odin City produces from energy and sends out as needed. There are two other kinds of packets, for ammunition and powering up special structures. Once enough construction packets have reached our collector, it will start operating.
It's a good time to get to know the two structures we've learned about a little more.
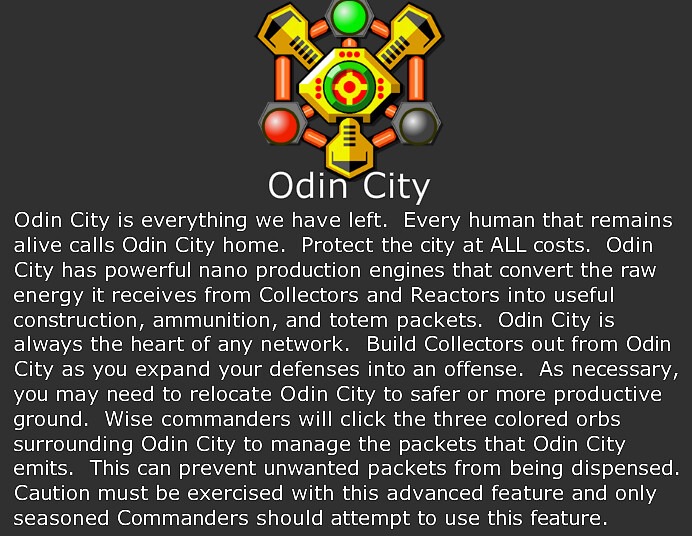
Regarding that last advanced feature, grey corresponds to construction packets, red to ammunition, green to special structures. It's not something that is needed to be done often; usually leaving all three on is best, but it can be useful.
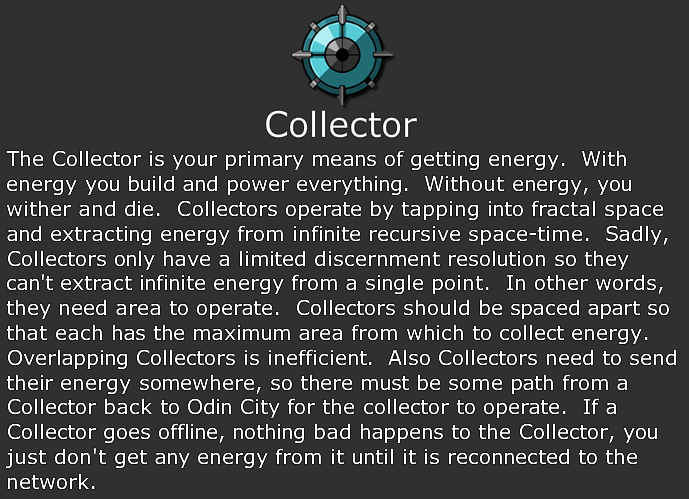
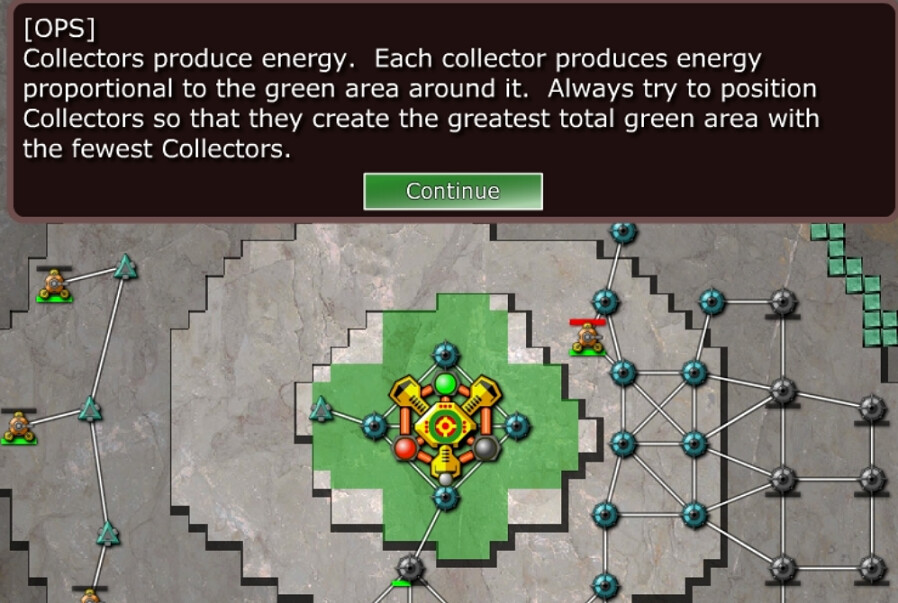
There is some serious gobbledygook technobabble going on here. 'Tapping into fractal space'? 'Infinite recursive space-time'? 'Limited discernment resolution?'. Do shut up. In terms of the numbers, a collector requires 10 energy to build and produces 0.1. That means it will generally take 100 seconds, 1.5-2 minutes, to pay for itself and be profitable for the rest of the level.

And the exposition continues. You can also see a lot more construction packets here, on their way to various collectors under construction. The connected group has now been activated, seen by the green terrain at the bottom of the screen.
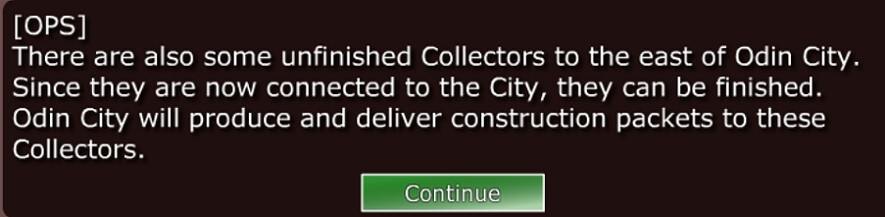
OPS is right on top of it with the same basic info.
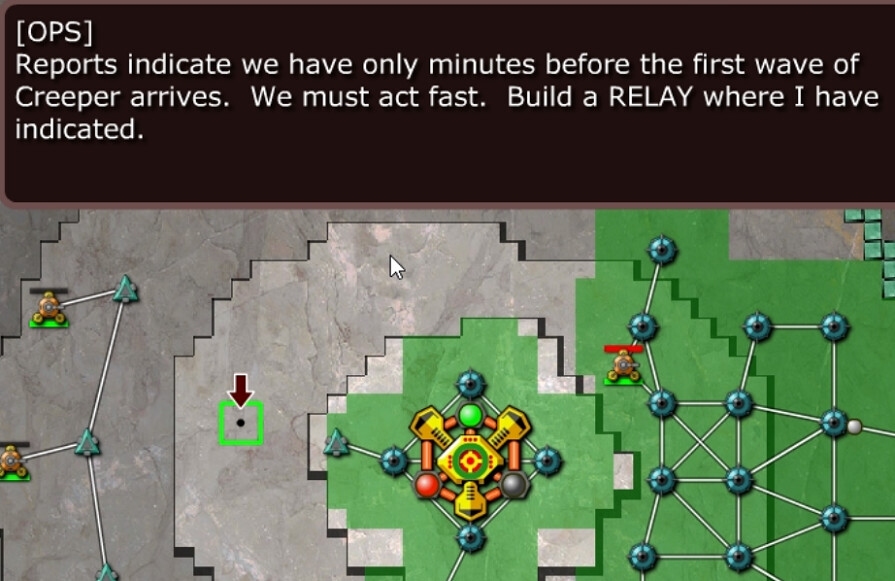
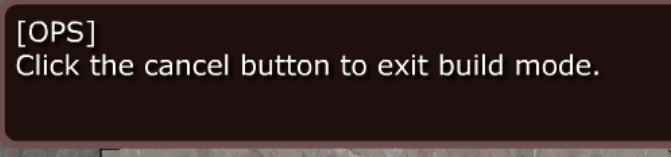
More false urgency, but it's time to familiarize ourselves with a new building. Just as they did with the collector, OPS instructs us to click Cancel once we've placed it, so we don't accidentally put one somewhere else(space bar works also, and in this mission, we can't build another one even if we wanted to. It's still good practice though).
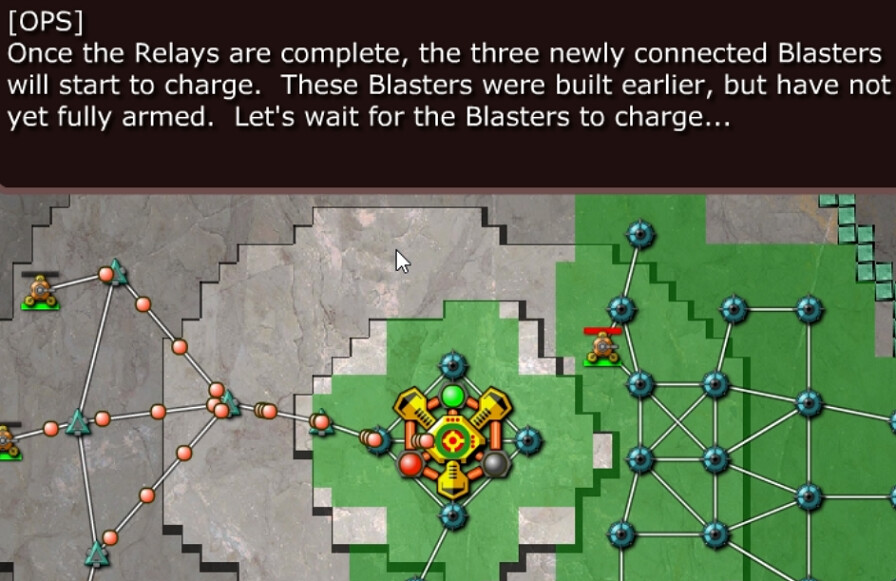
The longer connection spans between relays can clearly be seen here, as well as the reddish packets -- these are the ones for ammunition. At this moment in time, not visible here, we are producing 4.6 energy/second -- but sending out 6. Supplying ammunition can be costly.
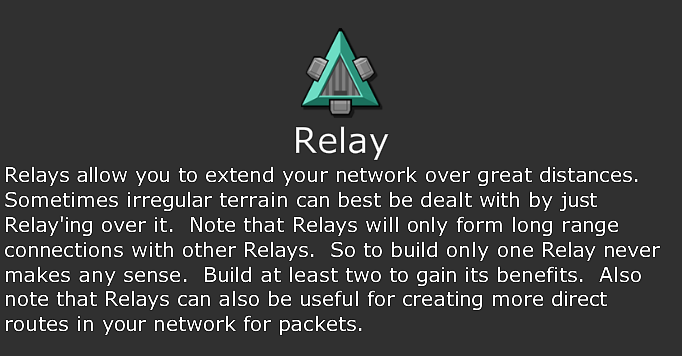
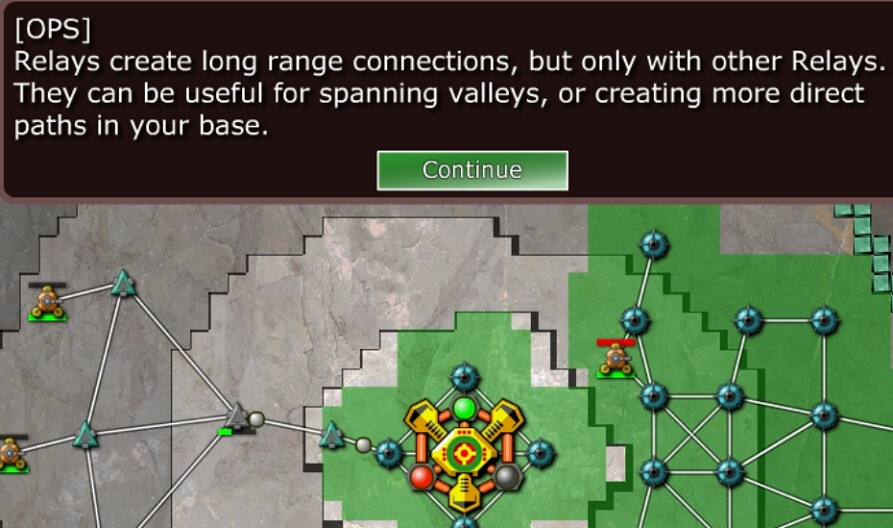
Good, concise, and to the point. I approve of this help file. The last statement about building more direct routes in your network can, in some circumstances, prove more valuable than meets the eye. Relays costs 20 Energy to build, twice that of a Collector, and produce nothing. Improving the network is the only reason to build them.
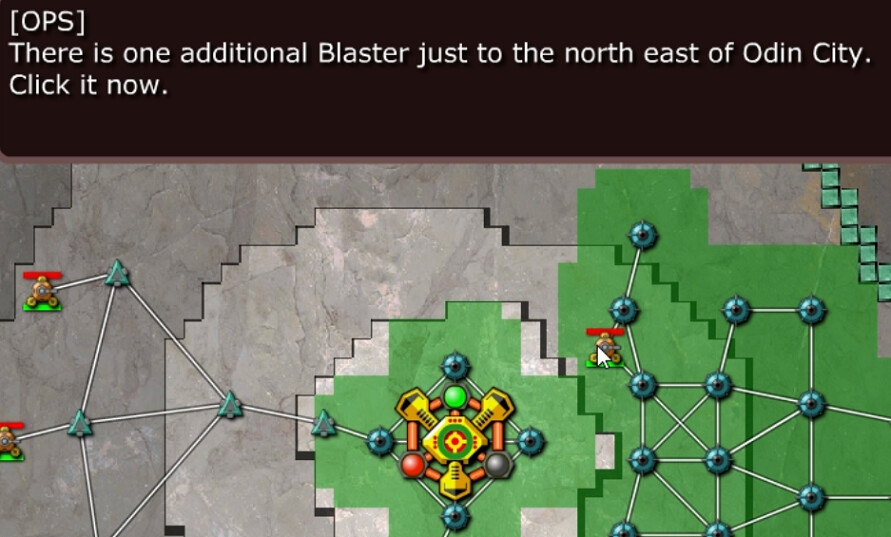

Where and when to place weapons is indeed among the key strategical choices to make on pretty much any level. Note the circle and whitened area, which mean pretty much the same thing they did before; connection radius(must be connected to the network, even if just another blaster or whatever) and firing range.
A few things to notice here. Obviously our enemy has arrived: more on it in a second. The Blaster has moved slightly; look closely and you'll see a green arrow fairly near it's destination. These always show up and flash across from the weapon to where it's moving. It will not fire until it gets where it's going, and it moves fairly slow, but it will get there.
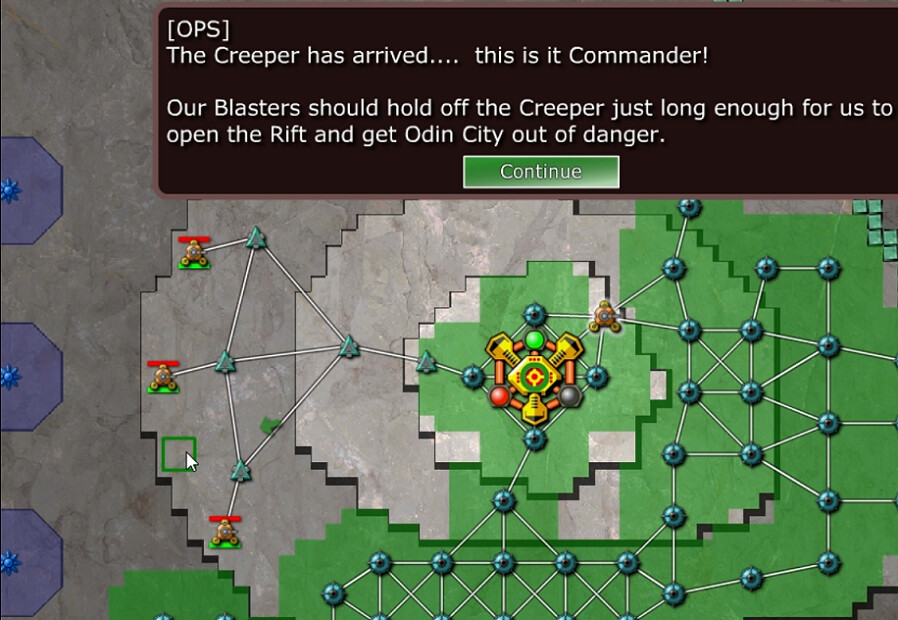
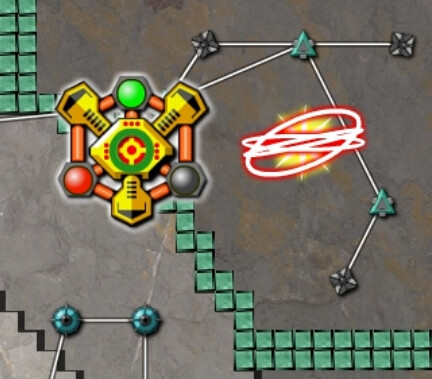
On the far left, the Creeper has indeed arrived. It spreads as a liquid as I've mentioned. The three bluish asterisk-type symbols are Creeper Emitters. Shockingly enough, they emit creeper. Most are pretty standard but some seem to emit more creeper than others. Generally though you can get a sense of how much creeper you are going to have deal with by the number of emitters. In this case, it's just enough that our four blasters(and we can't build more) are almost, but not quite, enough to halt it's advance. We aren't in as much trouble as OPS is claiming, but we can't just sit around forever and expect to survive either. Most importantly, Creeper Emitters can't be destroyed ... but they can be 'capped', so that they are less productive and easier to deal with. We'll see how to do that another time.
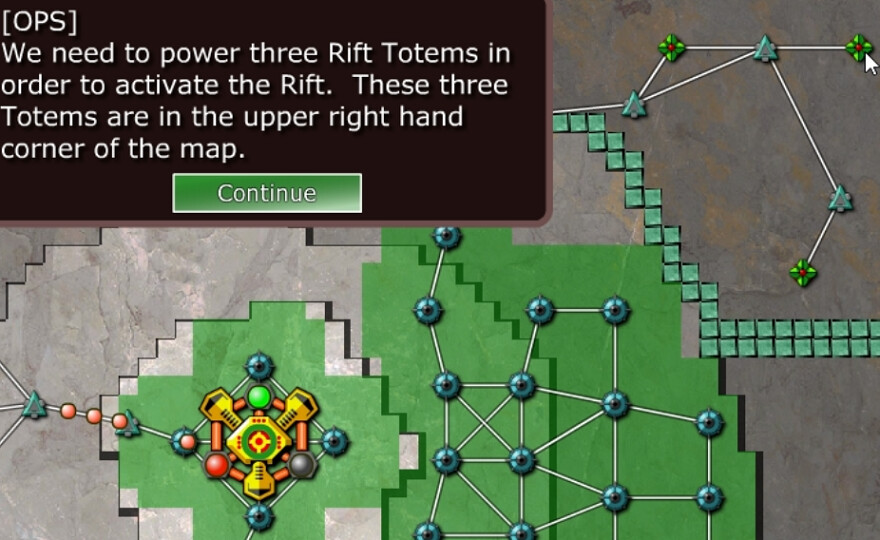
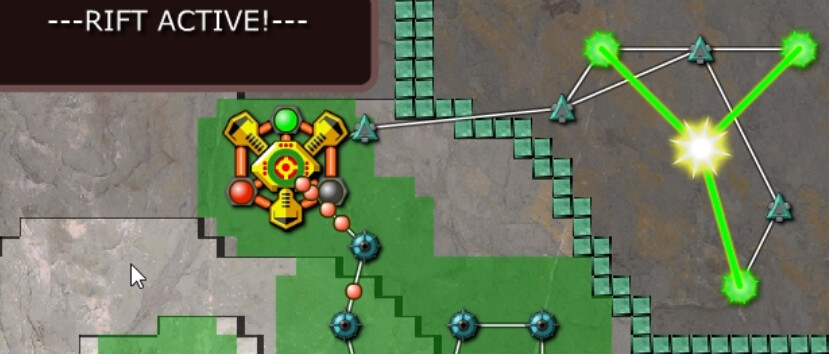
What OPS is describing here is how you win a level in Creeper World 1. A Rift Totem is one of the three symbols in the upper right, not the Relays but the ones the cursor is pointing at here. Look kind of like a green flower with a red center. We must connect to them and power them up. Often, though not in this case, they will be in Creeper-held territory, requiring us to navigate around or push back our free-flowing enemy before being able to open the Rift(think wormhole generator here).
Not visible here is the fact that our Blaster has almost landed and the other three are firing away at the incoming 'wave' of Creeper. It still advances, but they are slowing it down. Also, notice the light blue 'blocks' back in the upper-right. These are a fortification of sorts that delays, but cannot stop, the Creeper. It will eventually 'eat through' them, and once they go it can be a bit of a Creeper avalanche in some cases. This level can be lost. If one is aggressively passive enough and just waits to see what happens, eventually the Creeper eat through our barricade, and flood the area with the Rift Totems. Since we can't move blasters or build new ones due to the scripted nature of things, that'll be the end of things as the Relays will be destroyed if Creeper reaches them. You have to really try to let that happen though; it takes at least nine minutes and this level is finished in 2-3 at most, much faster than the time it takes to write about it.
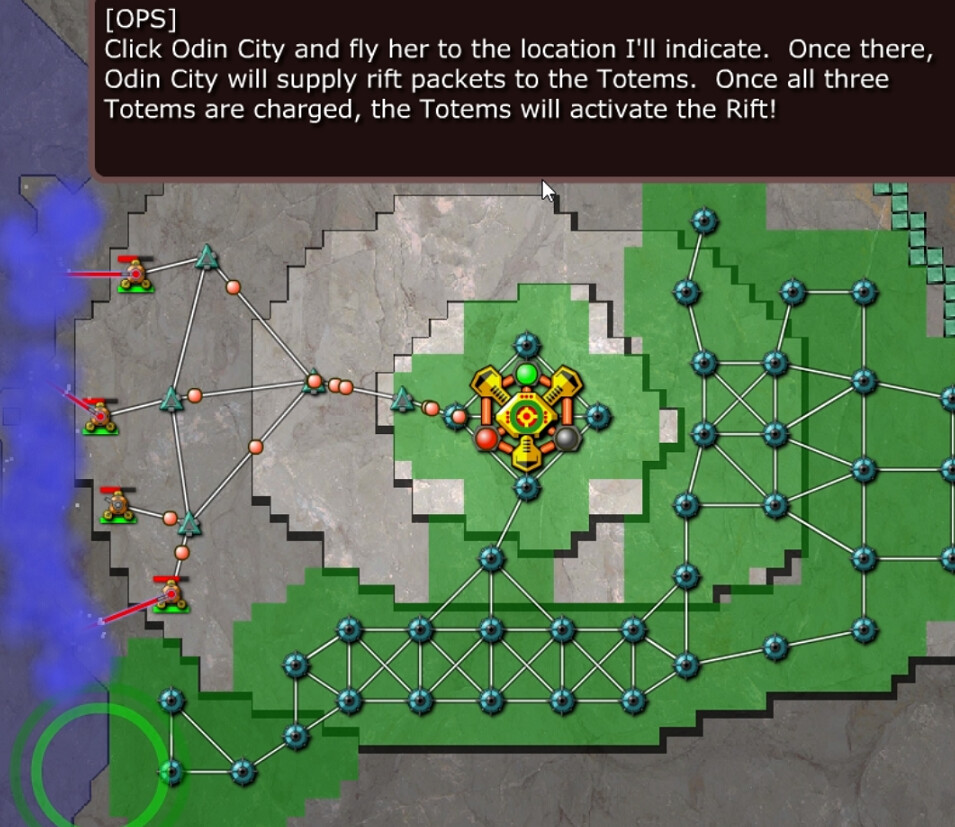
Odin City's ability to move can be valuable; getting it closer to the front, or out of danger usually. On the left we can see the blasters firing away, but despite their best efforts, the Creeper is winning. In the lower left, that green circle is the second Collector that we've lost exploding. Energy income has dropped slightly from 4.6 to 4.4. This reinforces the fact that it's time to get our of dodge.
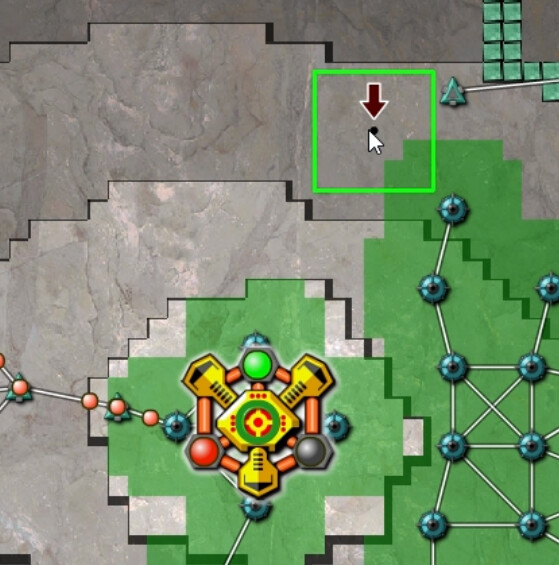
And we have liftoff! Even while aloft, Odin City can still provide packets to any nearby network-connected structures. Moves pretty slowly like the blaster, and it probably would have been faster just to build a Collector here ... but that wouldn't show off the mobility of our species' last hope now, would it?
At just after 2:30 on the mission timer, Odin City lands at it's destination. A connecting Relay is nearby, so it immediately starts sending out rift packets to the totems. Soon afterwards, the last of our lowest-elevation collectors have been destroyed by the ever-advancing creeper.
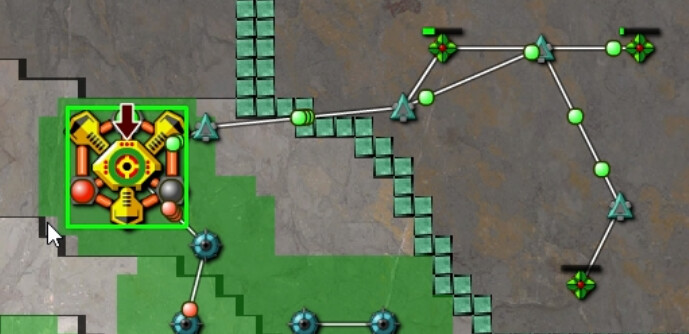
As soon as their power-up is complete, the Rift Totems do this, activating the Rift itself. Lasts a few seconds ...
Then the totems fall silent. They've done their job, and Odin City moves to the vortex.
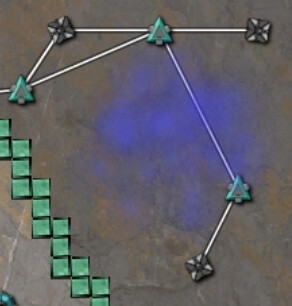
Once it arrives, Odin City is engulfed in a purple cloud, which then gradually dissipates. No further packets are sent out, because the city is no longer here. It has moved on. We have moved on. Humanity has persevered, and survived! Success!!
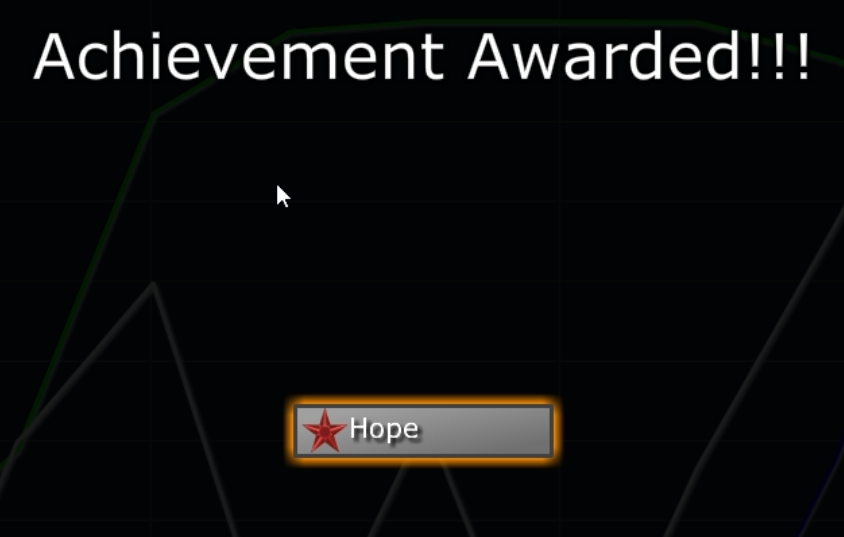
After every level, you are reminded that you've achieved something. Demonstrating full power of the faculties of orginality, each Achievement is the name of the planet you just escaped from. How exciting. After spending countless hours gazing in awe at this breathtaking accomplishment, you click Continue to ... well, continue.
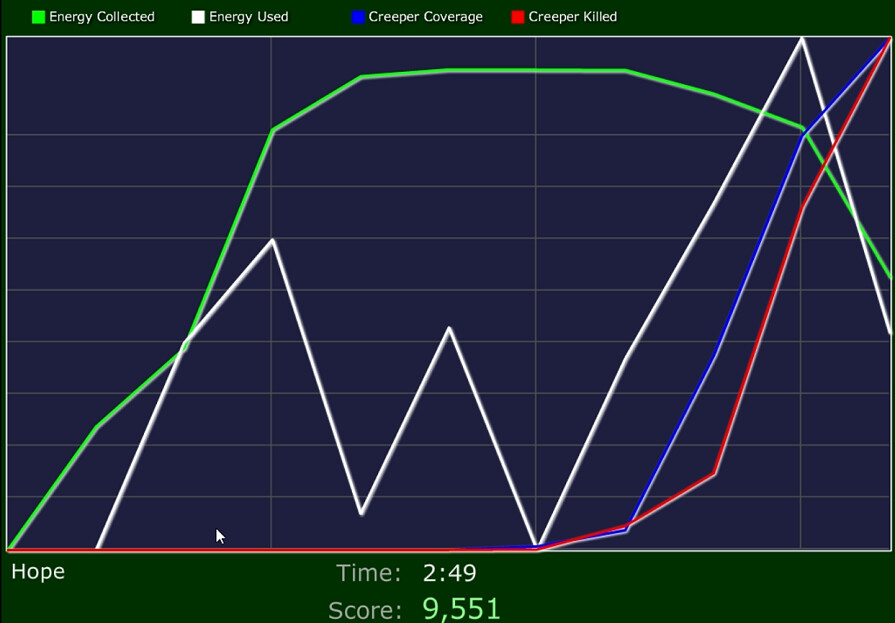
While I won't be subjecting you to the nearly-pointless achievement screen every level, this is another matter. The Performance Graph plots four variables over the course of the mission, along with recapping your time and related score. This can be quite useful in analyzing your performance. For instance, in looking at this one thing that stands out is in the middle area, we were collecting far more energy than we used. That's not good -- it means an inefficient economy. On most worlds, I'd look at that as an issue where I need to improve. In general we'll want to see the green and white lines track very closely together, so that we are using whatever resources are available to us. Additionally, creeper coverage will typically peak and then decline, while we'll want to have an escalating or at least consistently high after a certain point level of creeper killed. Not overly complex, but we can see important clues to how well we did here, if it is read intelligently.
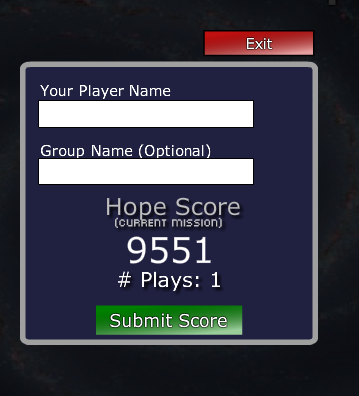
This is next, the final stop in any world/level. I won't be submitting scores since, as mentioned, my goal is to progress through the game, not be a speedrunner. But it's a cool option for those who are into such things. By the by, the record for Hope is around 9880. I intentionally went slow here, but that means(if you do the math, remembering you always start at 10k) the person who set that record accomplished it in just over a quarter of the time I did. Well under a minute. Some of the records are really impressive.
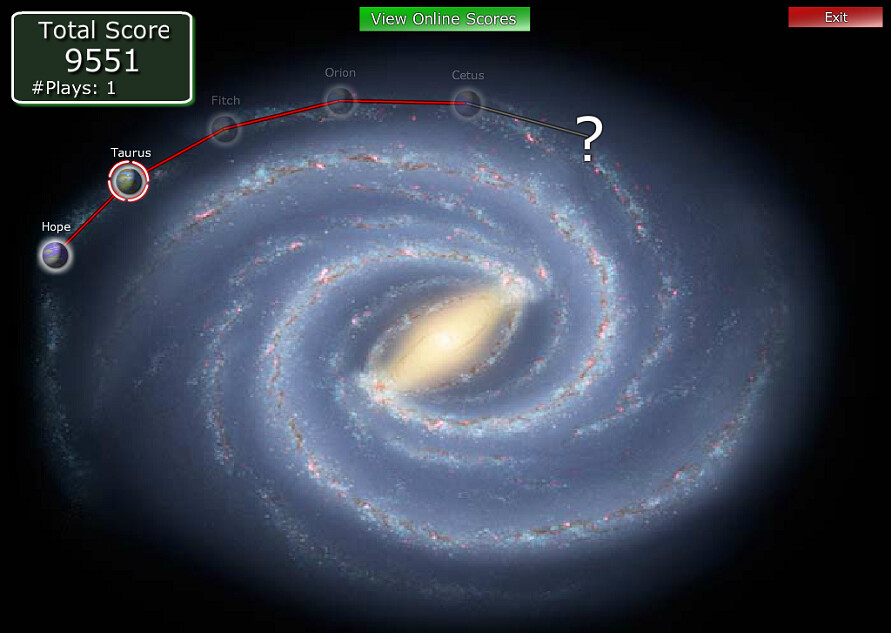
And now we've come full circle, back to our galaxy map, having progressed one world closer to our goal, whatever that may be. Any completed worlds can be replayed at any time, along with the next one in the chain, but we'll naturally keep moving forward. Humanity has survived, and it has us, their Commander, to thank for it. But is it merely a momentary stay of execution, or will we be able to meet the challenges of the Creeper at our next world? And the next, and the one after that, and ... ?? Note that we've had no further worlds revealed; that won't happen until we finish this leg of the story.
When next the adventure of Creeper World 1 continues, Odin City will arrive at Taurus. Until then, we drift through Rift Space, hoping we will be strong and smart enough to survive whatever we find there, and that the mysterious Old Man wasn't merely the village idiot ...